How Were The Pyramids Built Step By Step

Okay, grab your iced coffee and pretend we’re on a sun-drenched terrace in Giza, because today we’re cracking the ultimate ancient riddle: How were the pyramids actually built...
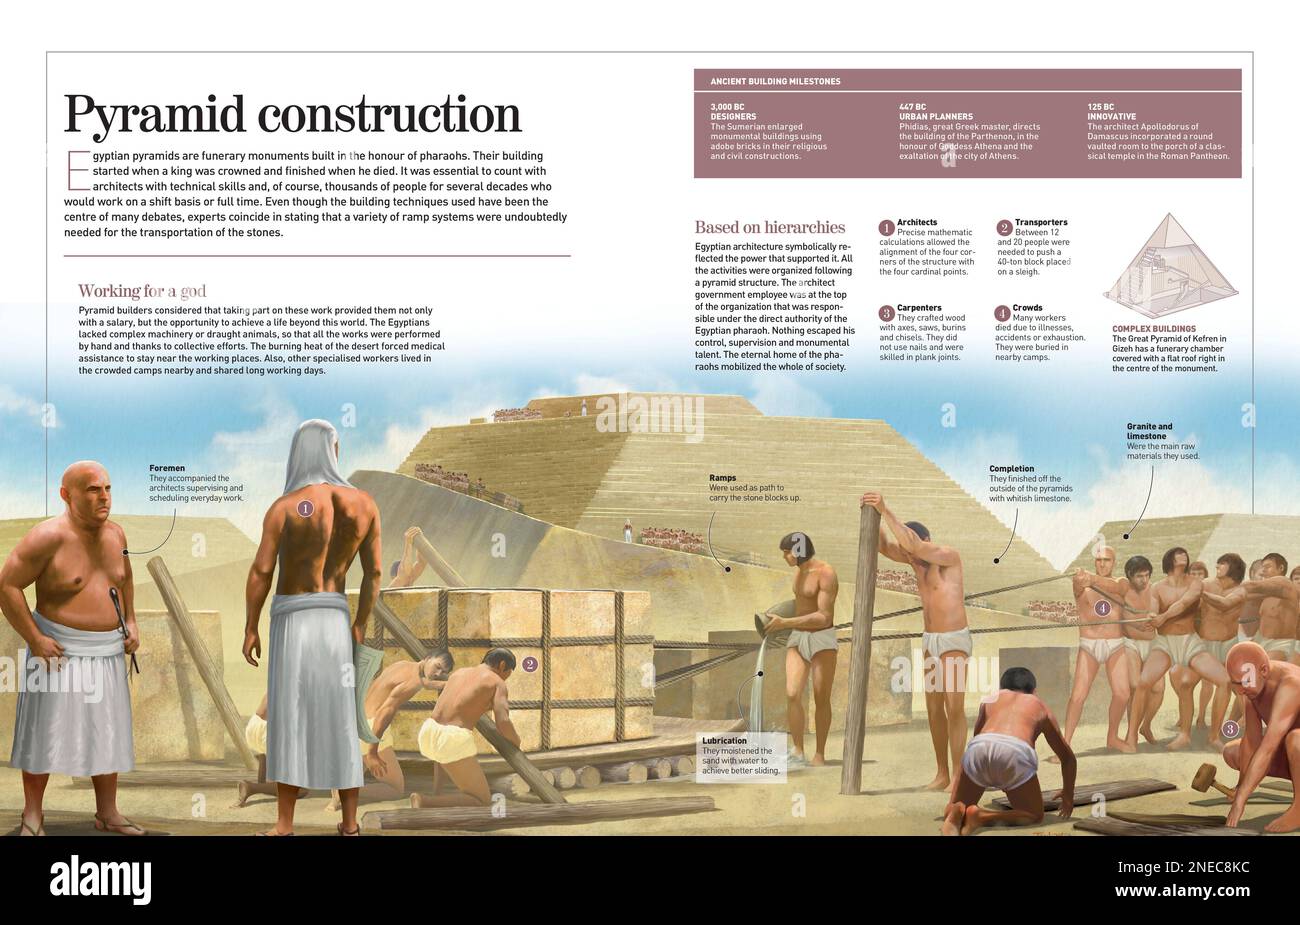
Okay, grab your iced coffee and pretend we’re on a sun-drenched terrace in Giza, because today we’re cracking the ultimate ancient riddle: How were the pyramids actually built, step by step? Spoiler alert: it wasn’t aliens, and it wasn’t a single guy with a really, really long ramp. Let’s dive in—sans time machine.
Step 1: Picking the Perfect Spot (and a Very Flat Day) First, the ancient Egyptians had to find bedrock—not sand, because sand shifts like a toddler’s attention span. They surveyed the Giza plateau, leveled it with incredible precision, and probably argued about parking spaces for sledges. Fun fact: They used water-filled trenches to check for leveling. So basically, ancient spirit levels. Talk about low-tech, high-brilliance.
Step 2: Getting the Stones (Quarry Edition) Most of the giant limestone blocks came from nearby quarries. Workers chiseled them out using copper tools and wooden wedges. When wood was soaked in water, it expanded and—pop!—the rock cracked clean. For the granite chambers inside, they floated those monster stones down the Nile on barges. Imagine that commute: “Hey Bob, can you scoot over? My 70-ton granite slab is blocking the view.”
Must Read
Step 3: Moving the Heavy Stuff (No Gym Membership Required) This is where the magic happened. Workers pulled the blocks on wooden sledges over wet sand. Yes, wet sand. Researchers found that adding just the right amount of water reduced friction by up to 50%. So while you’re sweating through a treadmill, remember your ancestors were dragging 2.5-ton rocks across a desert—and they made it look easy by literally pouring water on the problem. Hydration hack, anyone?
Step 4: Building the Ramp (The Great Debate of Ancient Engineering) No one’s 100% sure about the ramp design, but the leading theory? A zigzagging, mud-brick ramp wound around the pyramid as it grew taller. Workers kept raising the ramp, layer by layer. It’s like building a spiral staircase for a rock parade. Did it take forever? Probably. Did they throw block parties at the top? Absolutely not—no space for confetti.
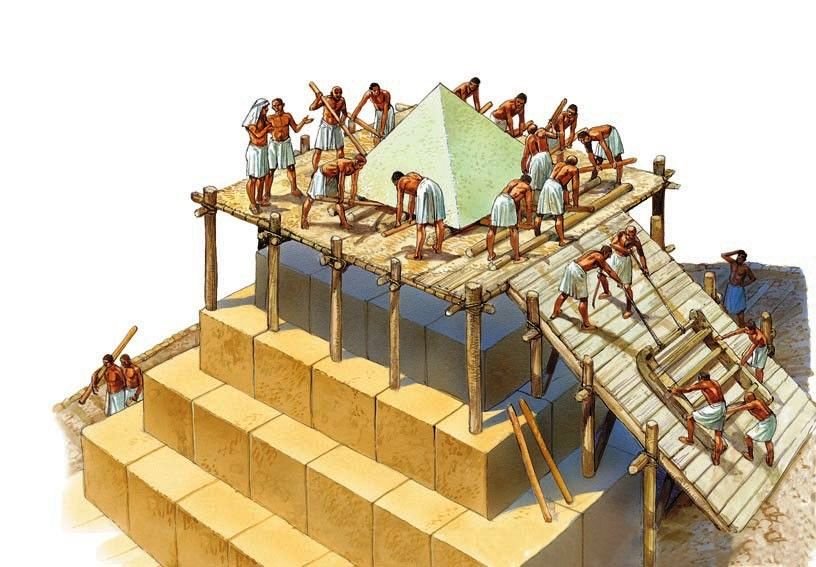 Process Of Building A Pyramid
Step 5: Setting Stones with Surgical Precision Once a block reached its spot, workers used wooden levers and rollers to nudge it into place. The final outer casing stones were polished to a mirror-like finish—so smooth you could probably see your hair frizzing in the reflection. These stones were fitted with gaps thinner than a credit card. Try doing that with your IKEA furniture.
Step 6: The Grand Finale (Capstone and Party Hats) The top was capped with a pyramidion, a small pyramid-shaped stone often covered in gold or electrum. It would catch the sun and shine like a beacon. Ancient bling. Then, workers removed the ramp, revealing the iconic shape we know and snap selfies with today.
 PPT - The Rise of Egypt PowerPoint Presentation, free download - ID:5829507
So, in a nutshell: water, wood, copper, and an absolute mountain of teamwork. No magic, no little green men—just thousands of people with incredible know-how and probably really great shoulder massages. Next time you see a photo of the Pyramids, give a little nod to those builders. They figured out physics before physics had a name.
And here’s your uplifting conclusion, friend: The Pyramids aren’t just about death or pharaohs. They’re proof that ordinary people can do extraordinary things when they put their heads—and their backs—together. So whether you’re finishing a project, learning a new skill, or just trying to get through your to-do list, remember: if they could stack limestone blocks for 20 years without Wi-Fi, you can totally tackle that pile of laundry. And maybe, just maybe, your own “pyramid” will still be standing in 4,500 years. Go build something awesome.
