How To Clean E Cig Tank

Hey there, vaping enthusiast! Grab a seat, let's chat about something that's been on our minds - cleaning that trusty e-cig tank of yours. I know, I know, it's not as exciting...
Hey there, vaping enthusiast! Grab a seat, let's chat about something that's been on our minds - cleaning that trusty e-cig tank of yours. I know, I know, it's not as exciting as trying out new e-liquids or checking out the latest mods, but it's a necessary evil, right?
Why Bother, You Ask?
Well, my friend, let me tell you, a clean tank is a happy tank. It's all about the flavor, baby! When your coil's all gunked up, it's like trying to taste your favorite meal through a mouthful of dirt. Not appealing, huh? Plus, a clean tank means a longer coil life. Win-win!
Now, don't go rolling your eyes at me. I promise, this isn't going to be a long, boring lecture. We'll keep it simple, fun, and you'll be back to vaping in no time. Let's dive in, shall we?
Must Read
Gather Your Squad
First things first, you're gonna need a few trusty sidekicks. I'm talking about some cotton swabs, paper towels, rubbing alcohol (isopropyl alcohol, 70% or higher), and some warm water. Oh, and don't forget your tank, of course!
Now, let's talk tools. Some people swear by ultrasonic cleaners, but they're not a must-have. A simple bowl of warm water and some elbow grease will do the trick just fine. If you're feeling fancy, you can use a small brush to really get in there.
Disassembly 101
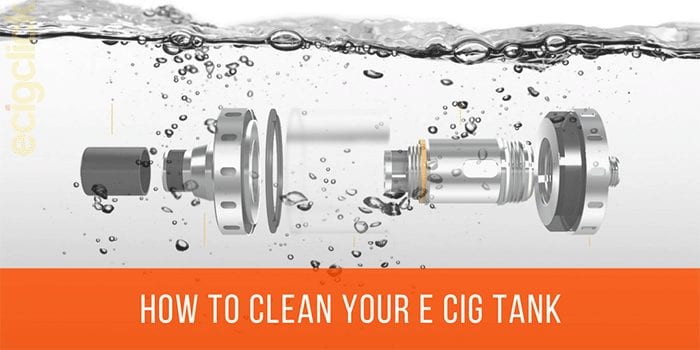
Alright, it's time to take your tank apart. Don't worry, it's not as scary as it sounds. Just remember, take your time and keep track of all the tiny pieces. You don't want to lose your O-ring and have to buy a new tank because of a little mishap.
Start by removing the drip tip and the base of the tank. Then, unscrew the tank from the coil. If you're using a rebuildable atomizer (RDA), this is where you'll remove the deck and the posts. Once everything's disassembled, you should have a bunch of little parts ready for a bath.
Soaking Up the Good Stuff
Now, fill a bowl with warm water and add a few drops of rubbing alcohol. This is going to help cut through any stubborn gunk. Drop all your tank parts into the bowl, making sure they're fully submerged. Let them soak for about 15-30 minutes. It's like a little spa day for your tank!
While you're waiting, why not grab a snack or catch up on your favorite show? Just make sure you set a timer so you don't forget about your soaking parts. Trust me, coming back to a bowl of gross, cold water is not the way you want to end your cleaning adventure.
 Ultimate Vape Tank Guide For Beginners + Troubleshoot Your Tank
Scrub-a-Dub-Dub
Okay, timer's up! It's time to give your tank parts a good scrub. Use your cotton swabs and brushes to really get in there and clean off any remaining gunk. Be gentle, though. You don't want to damage the delicate parts.
Pay extra attention to the coil and the base of the tank. These are usually the dirtiest spots. If you're using an RDA, now's the time to clean the posts and the deck. Once everything's clean, use a paper towel to dry off the parts.
Putting It All Back Together
Now comes the fun part - reassembly! Start by reattaching the coil (or rebuilding your coil, if you're using an RDA). Then, screw the tank back onto the coil and reattach the base. Don't forget to put the drip tip back on!
Before you fill your tank with your favorite e-liquid, give it a quick rinse with some warm water to get rid of any remaining alcohol. Then, let it dry completely. I know, I know, it's torture to wait, but it's worth it to ensure a smooth vape.
And That's a Wrap!
And there you have it, folks! Your tank is clean, and you're ready to vape in style. I told you it wasn't so bad, didn't I? Now, go forth and enjoy that fresh, delicious flavor. You've earned it!
Oh, and one last thing - make sure to clean your tank regularly. I know, I know, it's not the most exciting task, but it'll keep your tank in tip-top shape and your coils lasting longer. Win-win, right?
Until next time, happy vaping!
